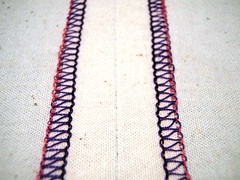
There are dozens of different seams you can use to finish a garment. Sometimes you'll use a French seam on a delicate fabric. Other times, you'll use a flat-fell seam to create strong and sturdy seams on a strong and sturdy fabric. But these seams are both enclosed seams. Useful, yes, but if you need to reduce bulk and create a more flexible seam, you may want to explore the world of overedge seams.
An overedge seam is finished with closed seam allowances and is typically quite narrow. One quick and easy option is the overlock seam. This seam prevents unraveling, making it perfect for knits and other stretch fabrics. To pull this one off, you need a serger, otherwise known as an overlock machine. Once you've sewn your seam, pass the raw edge through the serger. This will both finish the edge of the seam and trim the seam allowance. You can either feed each seam allowance separately and press open, or press them together and finish them as one. If you finish them as one, press the seam allowances to one side.
A serger can also be used to stitch the seam and finish the seam allowance in a single pass. To do this, you'll have to check your serger's manual for specific directions. It's not that difficult, but I still prefer to sew the seam first myself and then finish with the serger. Though doing it all at once may be a little quicker, I find the quality of the seam itself isn't as precise as I'd like.
The benefit of an overlock seam is that it will not fray. It really can't, not bound and trimmed the way it is. But this seam finish doesn't work well on delicate fabrics. Use it for knits and stretch fabrics and you'll be pleased with the results.

